2. Arm Casing
For a list of components with photos, see section 0. Components.
Steps
All the steps below are demonstrated using the left arm.
1. J1-J2 Casing
The J2 cable must be routed through the J1–J2 casing. Fit it into J1–J2_B and then close the casing.
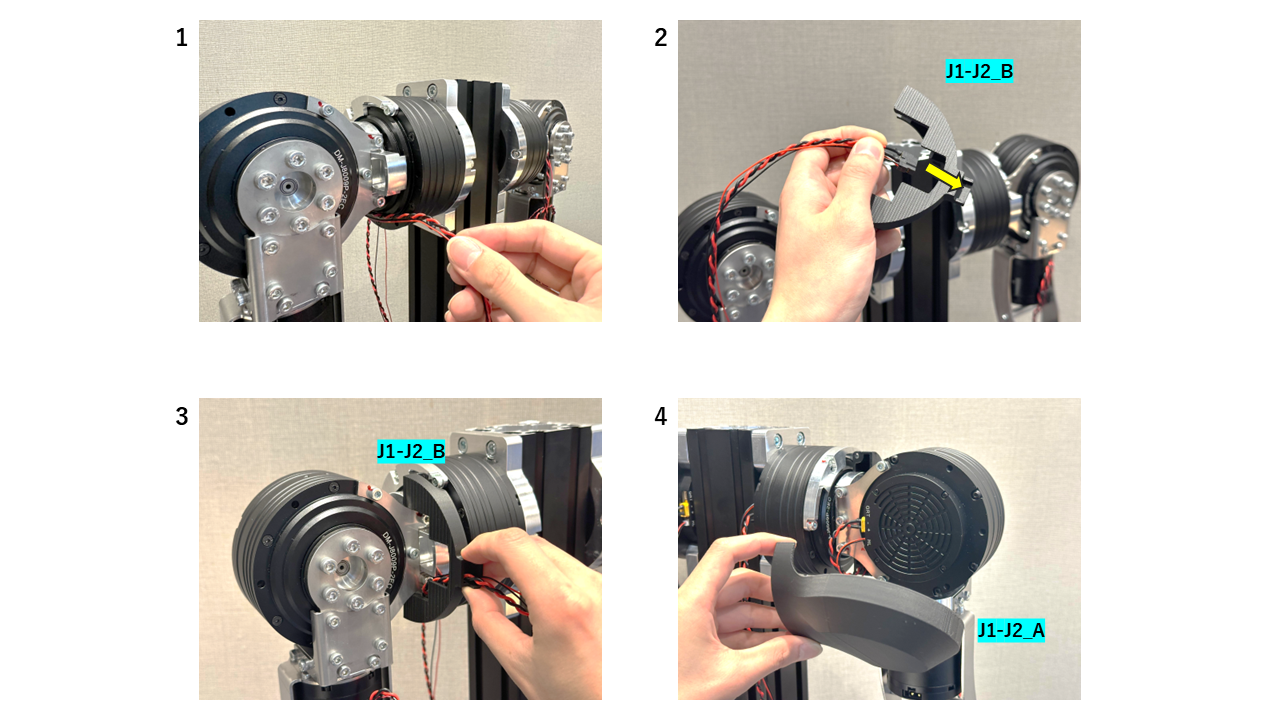
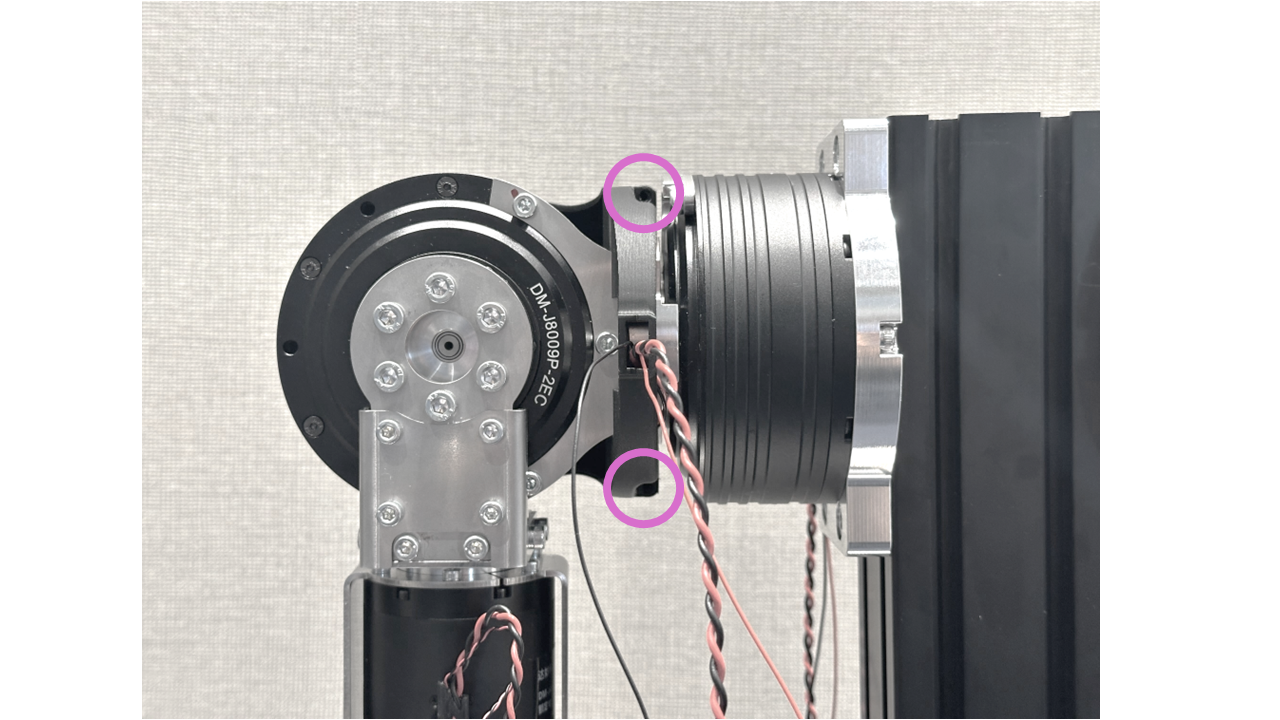
Secure the casing using two screws.
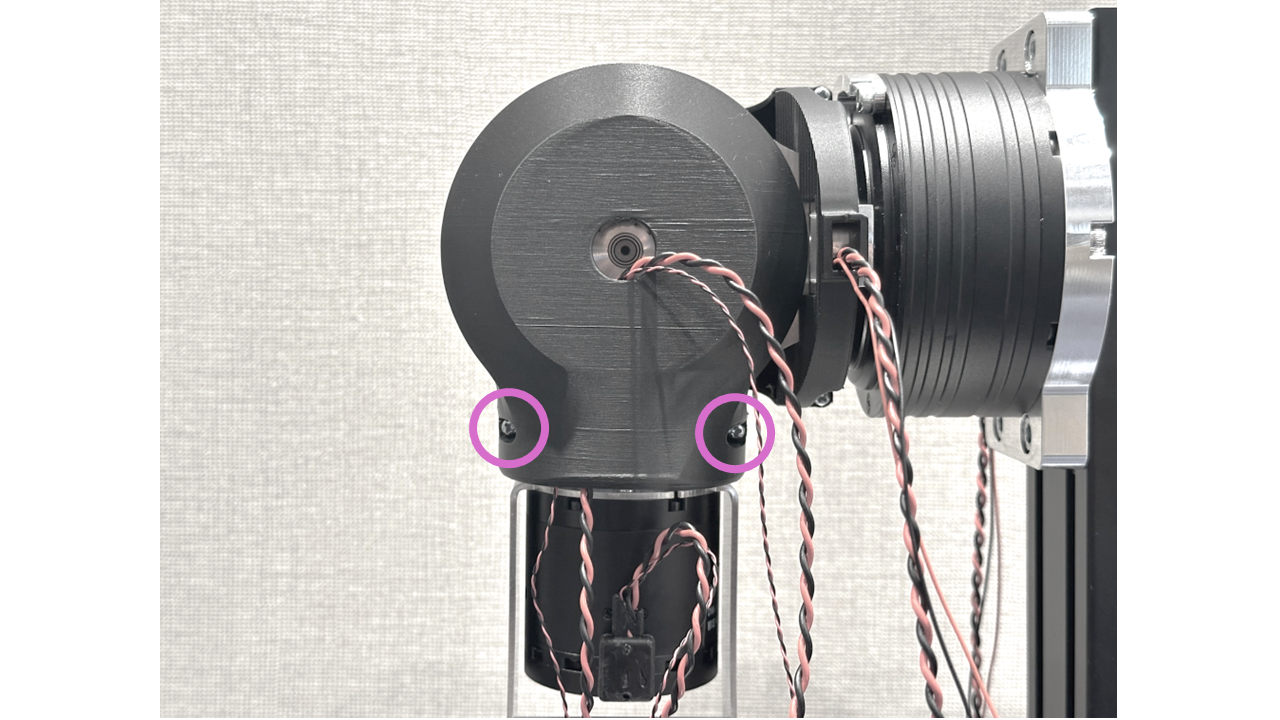
2. J2-J3 Casing
Route the J3-J4 cable through the J2-J3_B. Insert the locking nail of J1-J2_A into the J2 motor's center hole and slide it up.
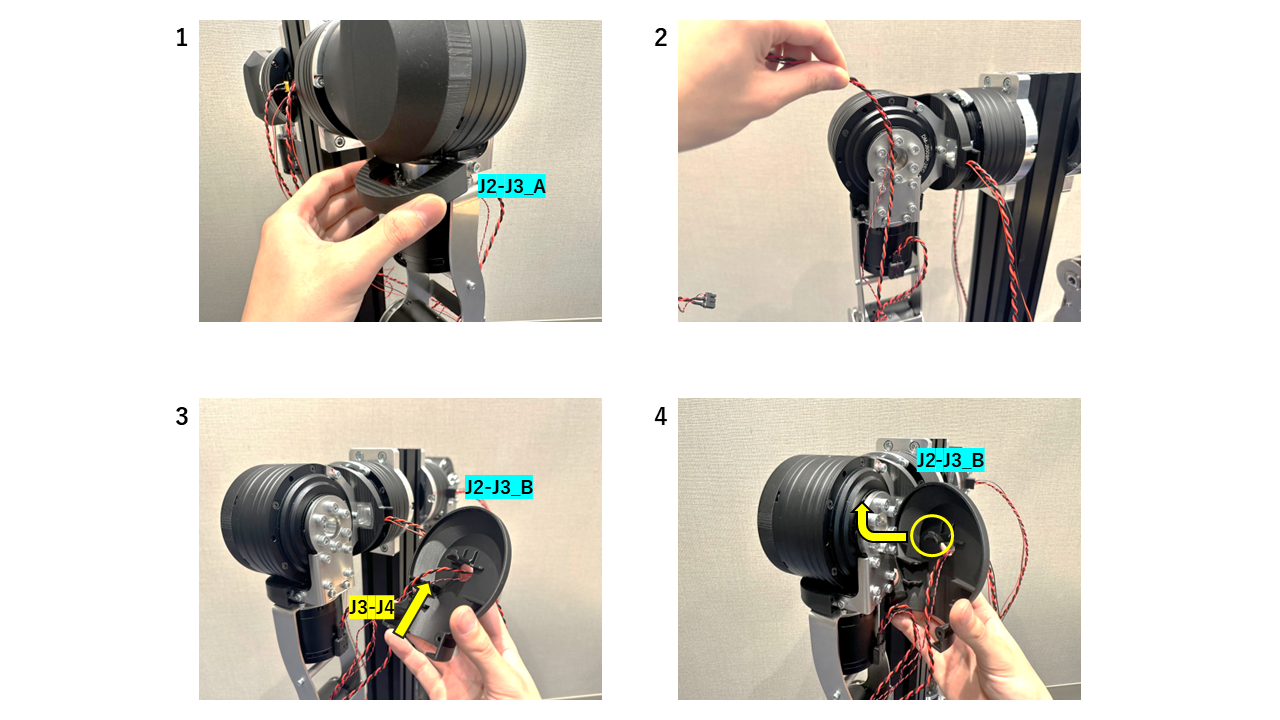
Secure the casing using two screws.
3. J3-J4 Casing
Attach J3-J4_A from the front and J3-J4_B from the back.
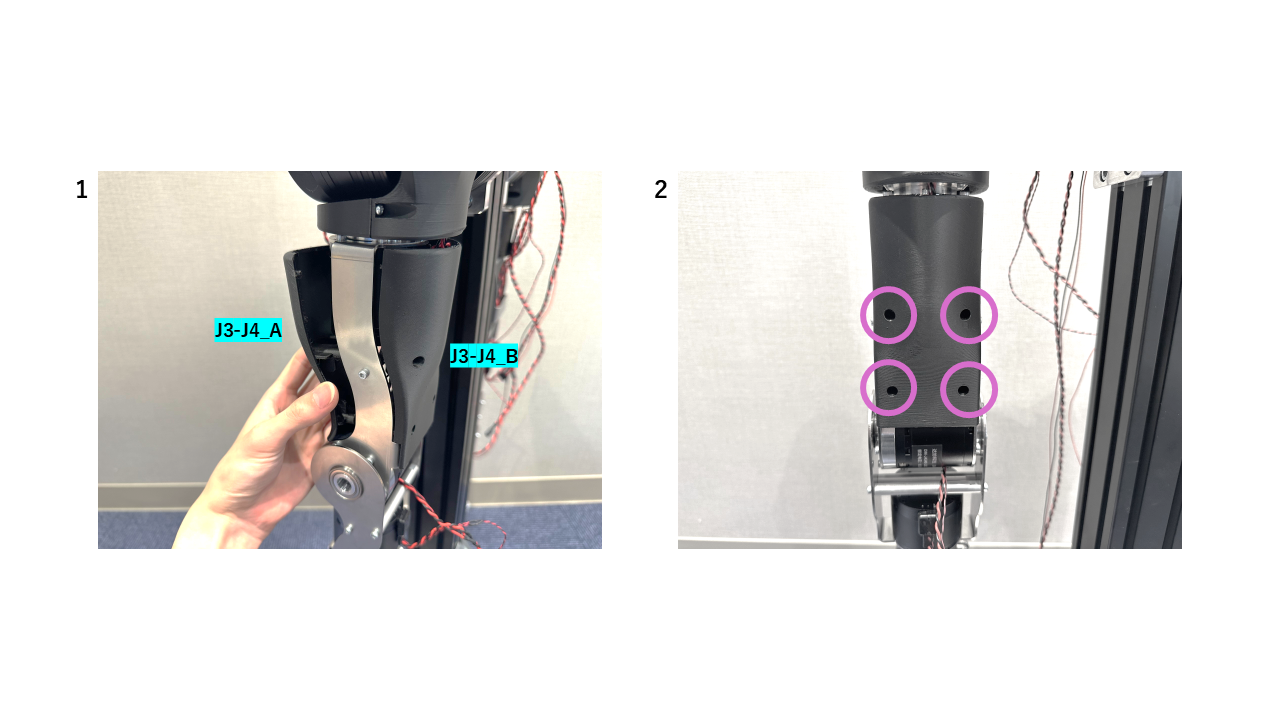
Secure the casing using four screws.
4. J4-J5 Casing
Before installing J4-J5_B, route the J4-J7 cables to the inner side of the arm. Lead them into the inner slot of J4-J5_B and attach the casing into position.
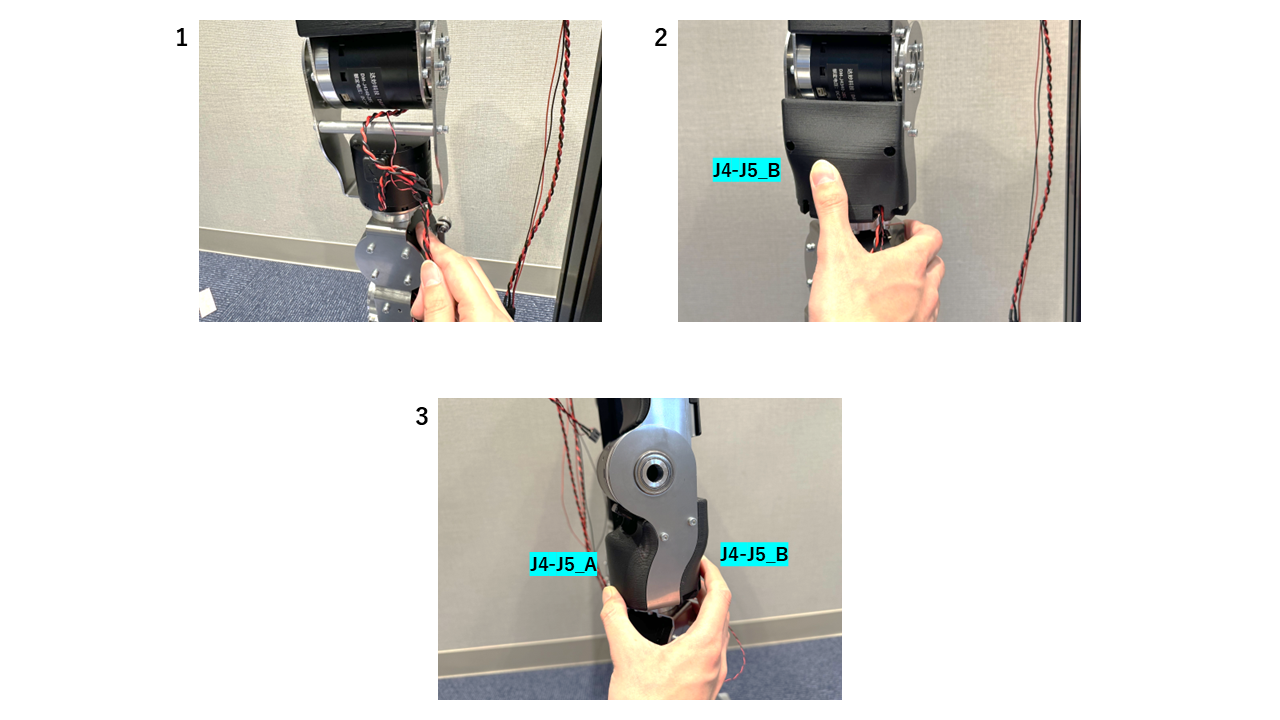
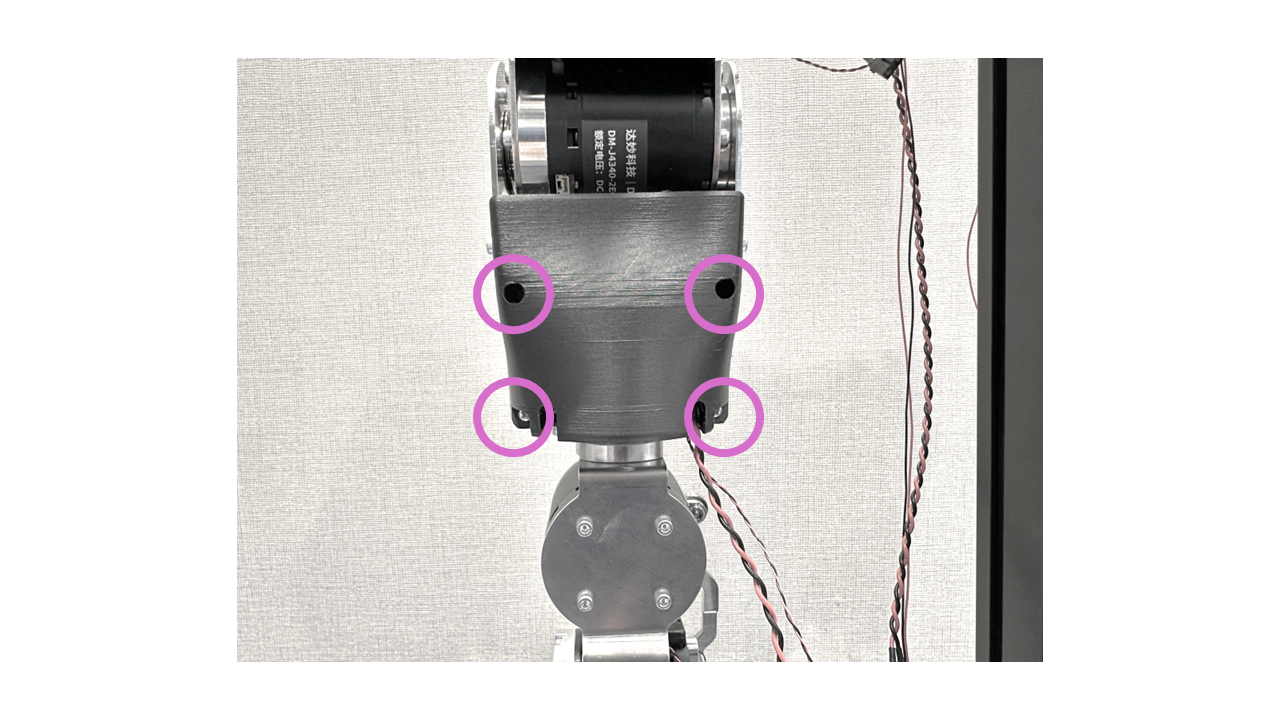
Secure the casing using four screws.
5. J6-J7 Casing
These components have left and right distinctions. Please check carefully.
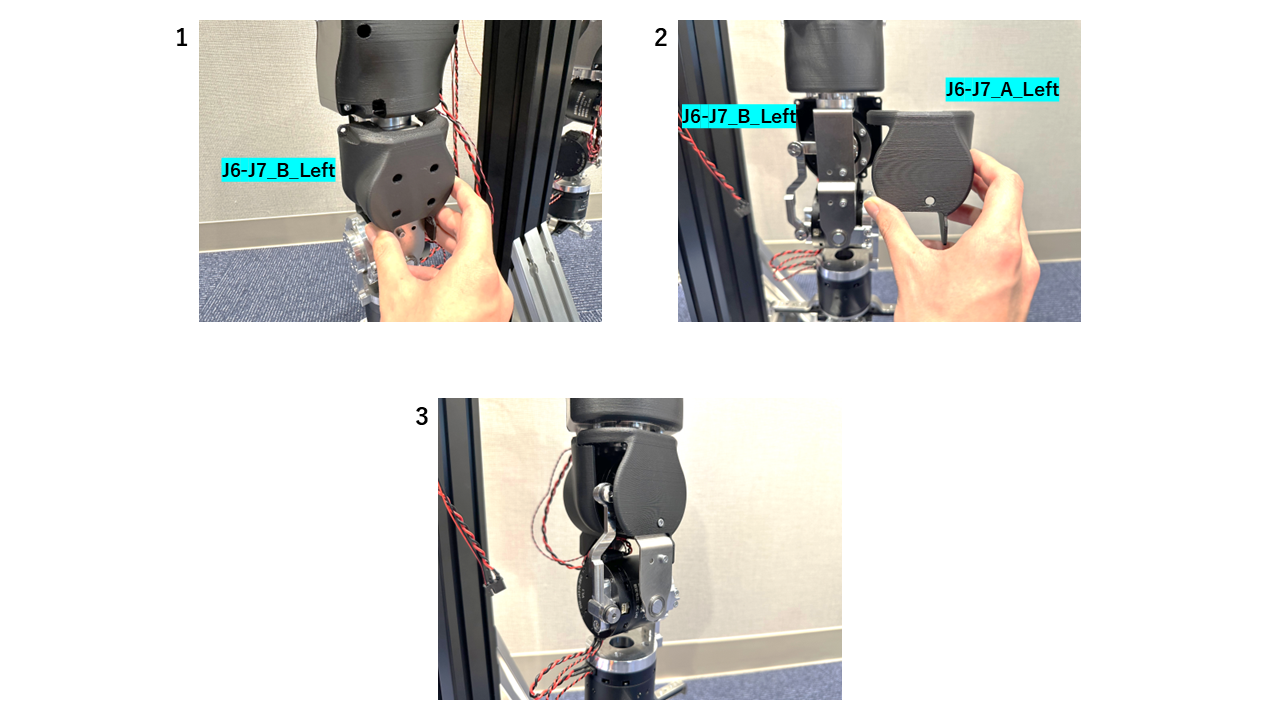
Secure the casing using three screws.
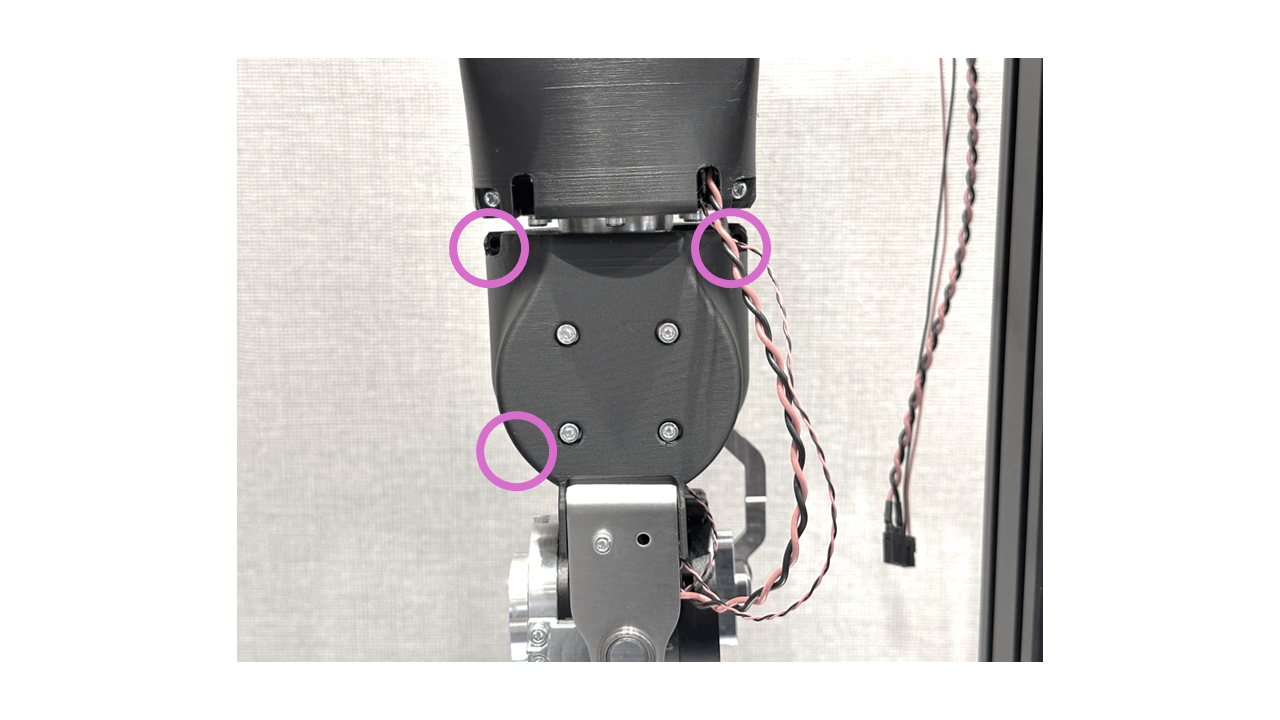
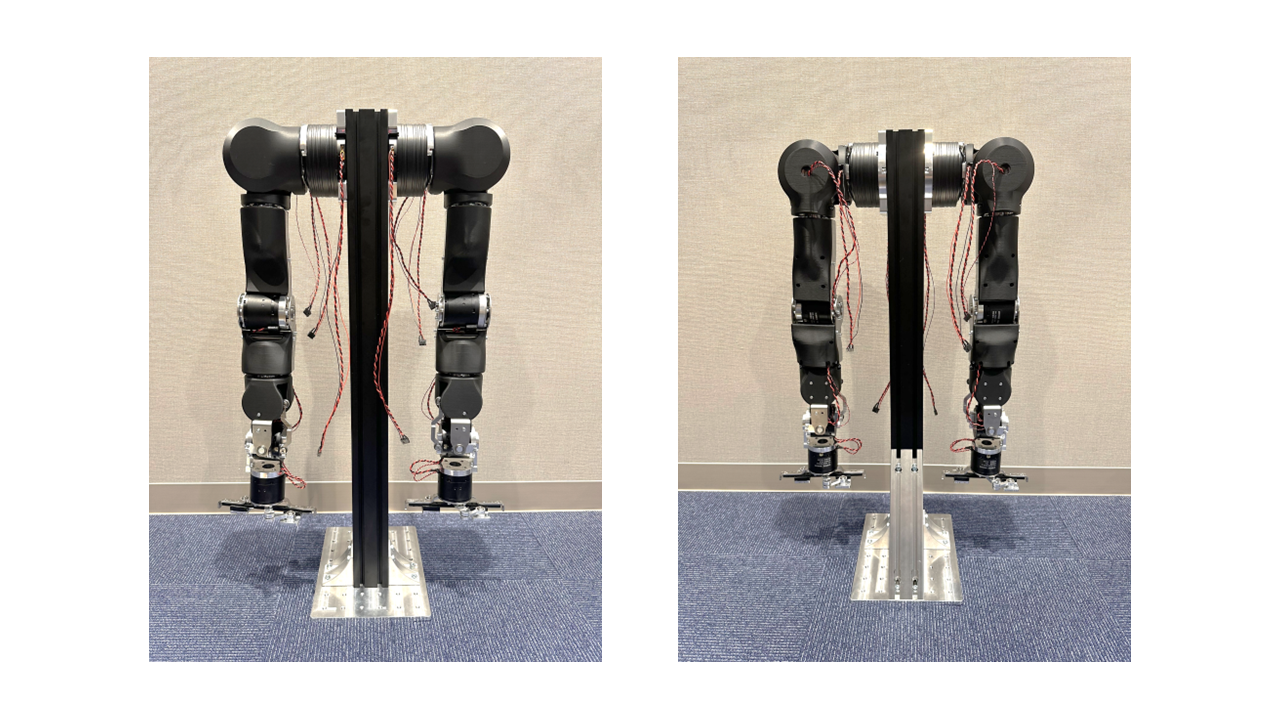
Check that your OpenArm looks the same as this picture.