Calibration Workflow
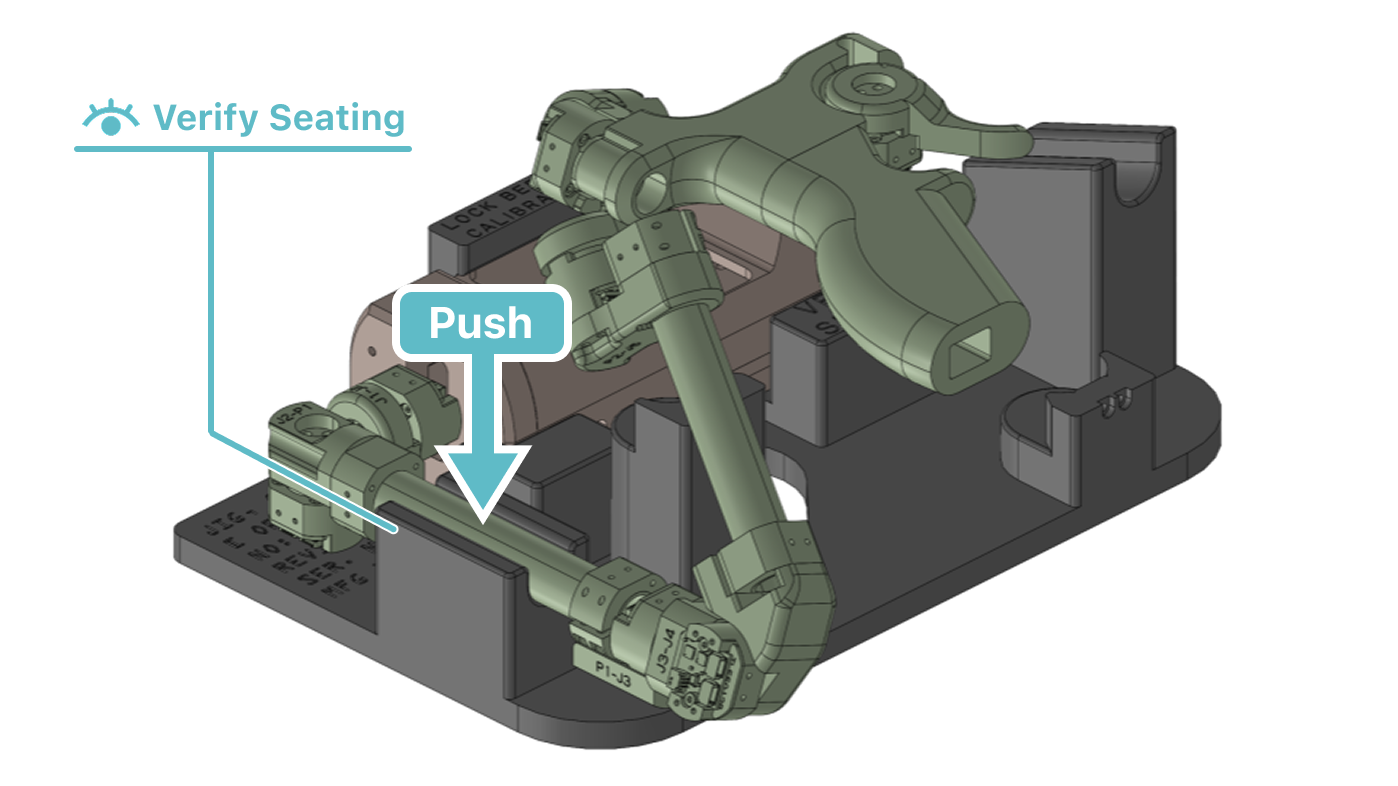
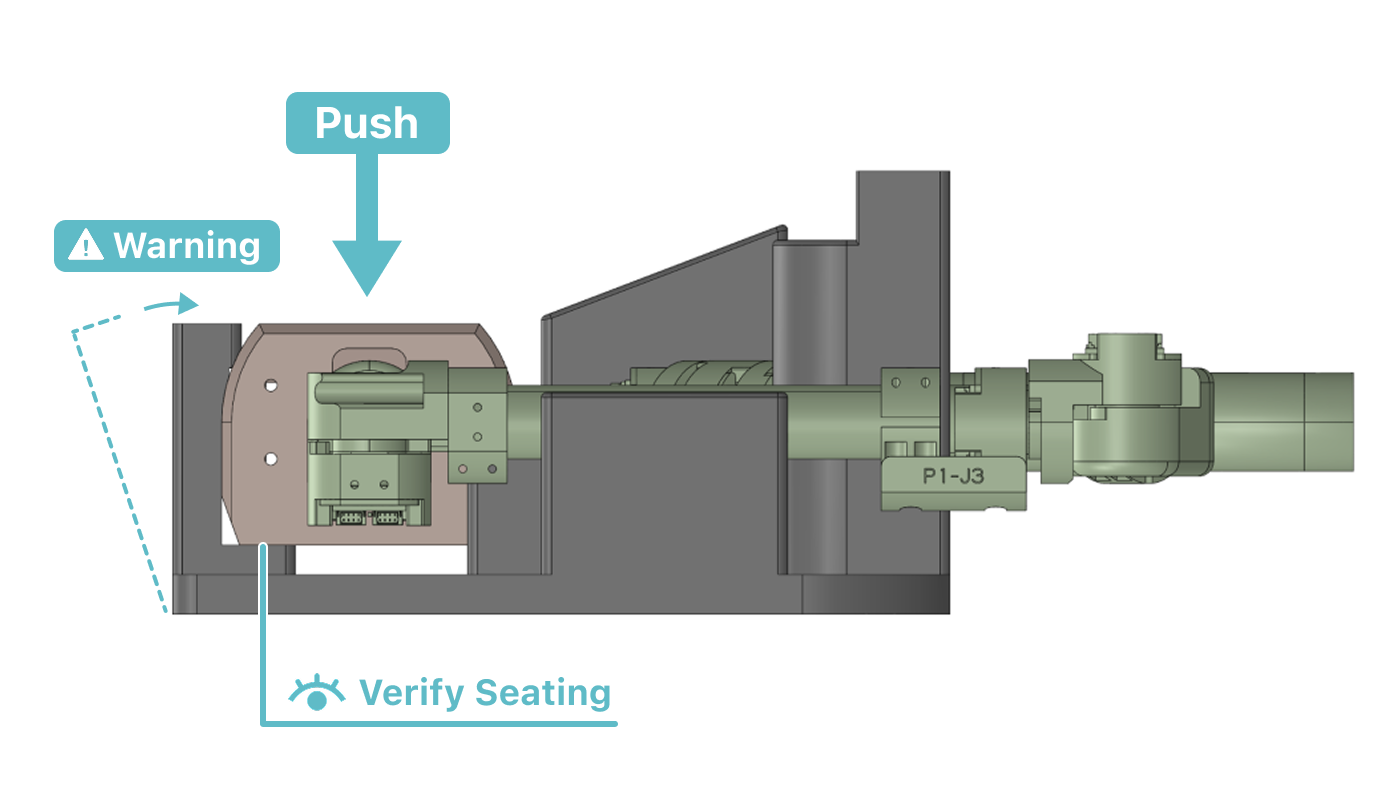
Step 1: Right- P1
Place the right arm pipe (P1) by pressing it into the recess of the jig as shown in the figure. Make sure that the pipe is firmly seated in the recess.
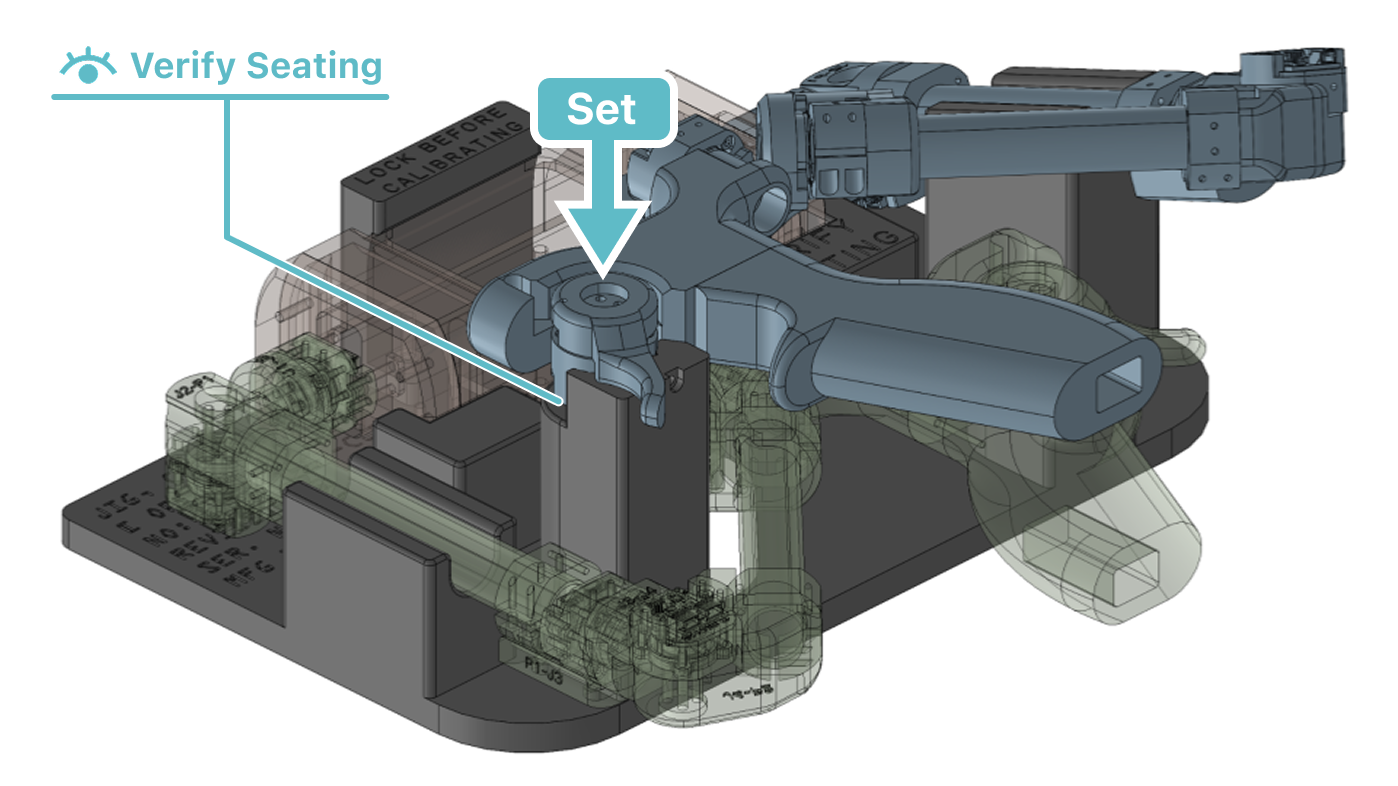
Step 2: Right- J8
Place the trigger section (J8) of the right arm as shown in the figure. Make sure that the flat surface of J8 is firmly seated against the flat surface of the jig.
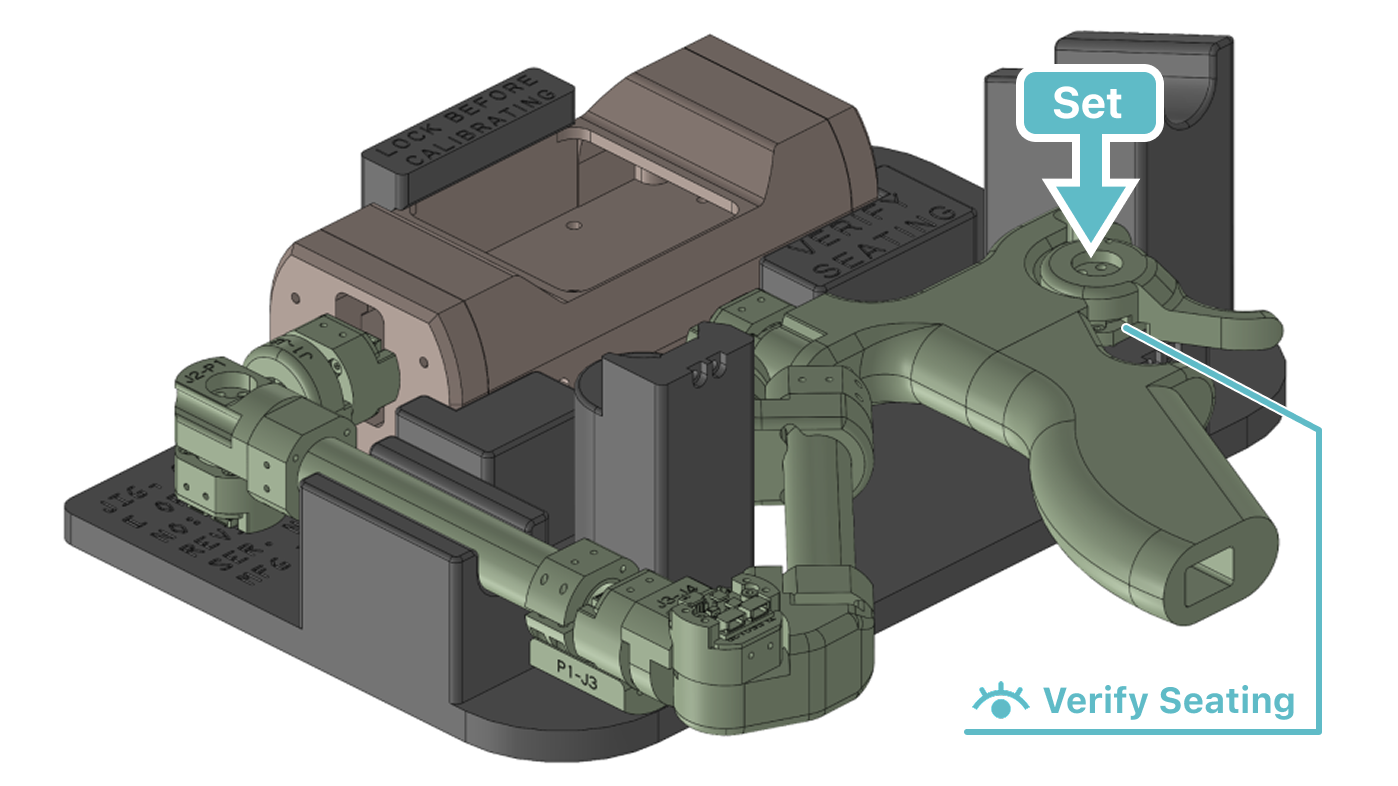
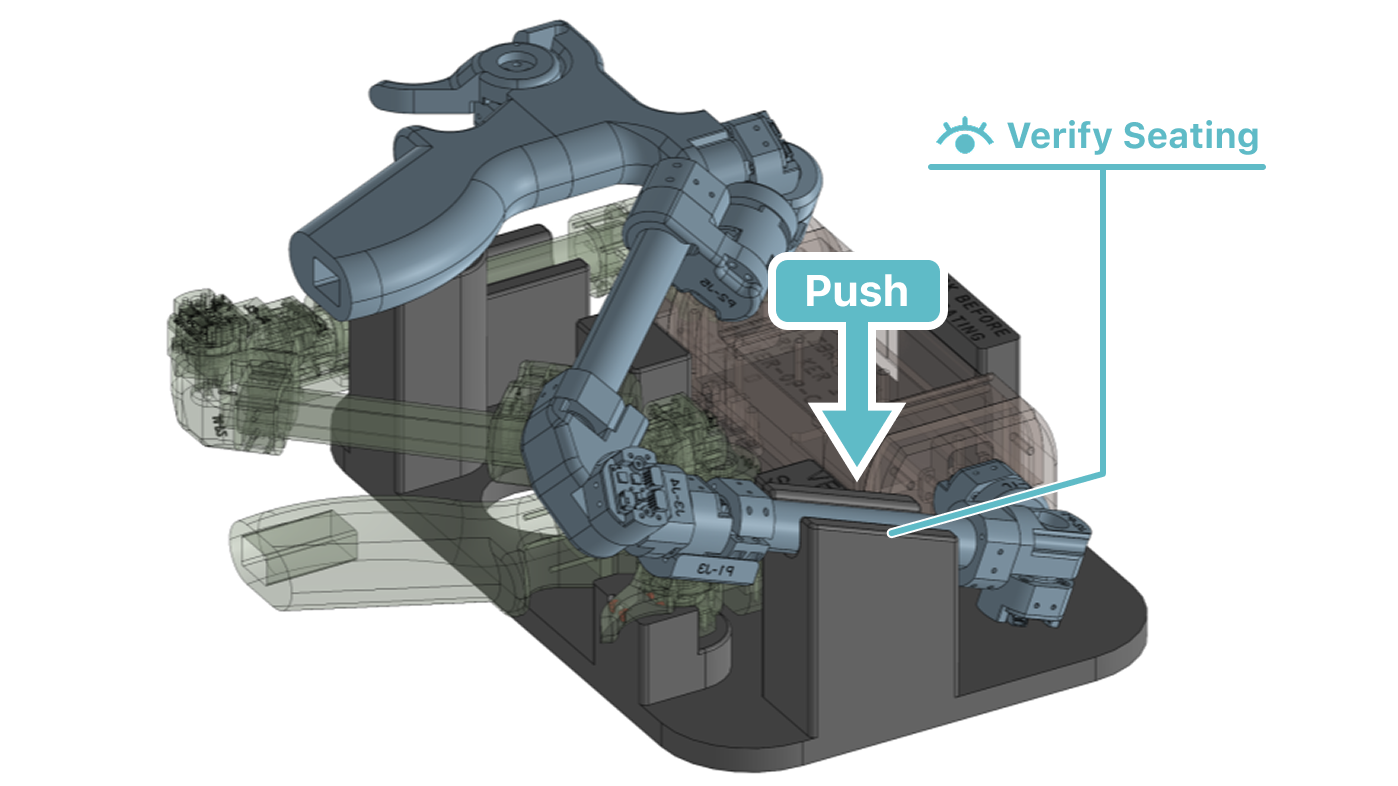
Step 3: Engage Body Lock
Press the body against the jig and secure it firmly. Make sure that the rear surface of the body is firmly seated against the flat surface of the jig.
A snap fit structure is used to fix the position of the body relative to the jig. When attaching the body, gently flex the jig frame while pressing it into place. Be careful not to bend the jig frame excessively, as this may cause damage.
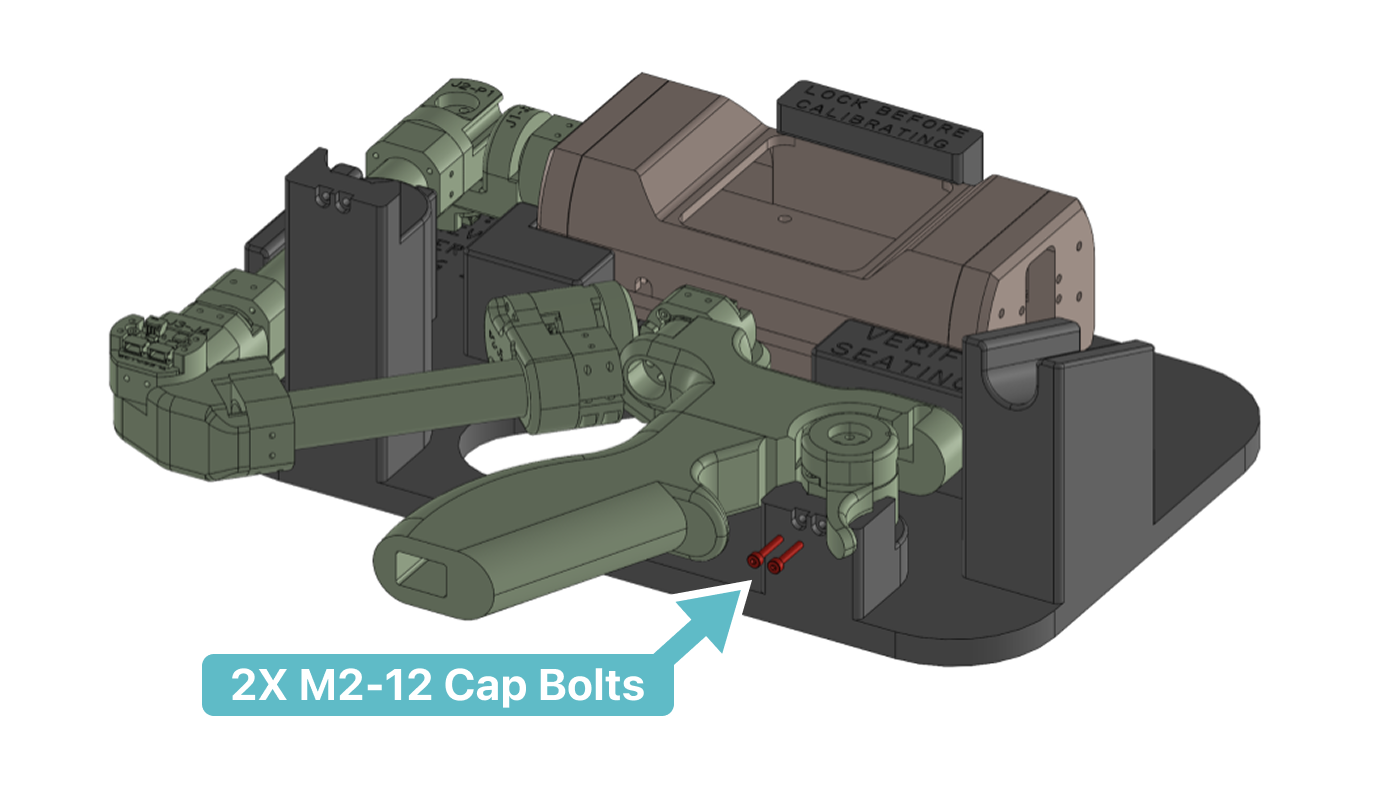
Step 4: Right- Fasten J8
With the right arm set in the jig, secure J8 using two M2 screws with a length of 12 mm. While tightening the screws, make sure that J8 is not fixed in a misaligned position.
Step 5: Left- P1
Place the left arm pipe (P1) by pressing it into the recess of the jig as shown in the figure. Make sure that the pipe is firmly seated in the recess.
Step 6: Left- J8
Place the trigger section (J8) of the left arm as shown in the figure. Make sure that the flat surface of J8 is firmly seated against the flat surface of the jig.
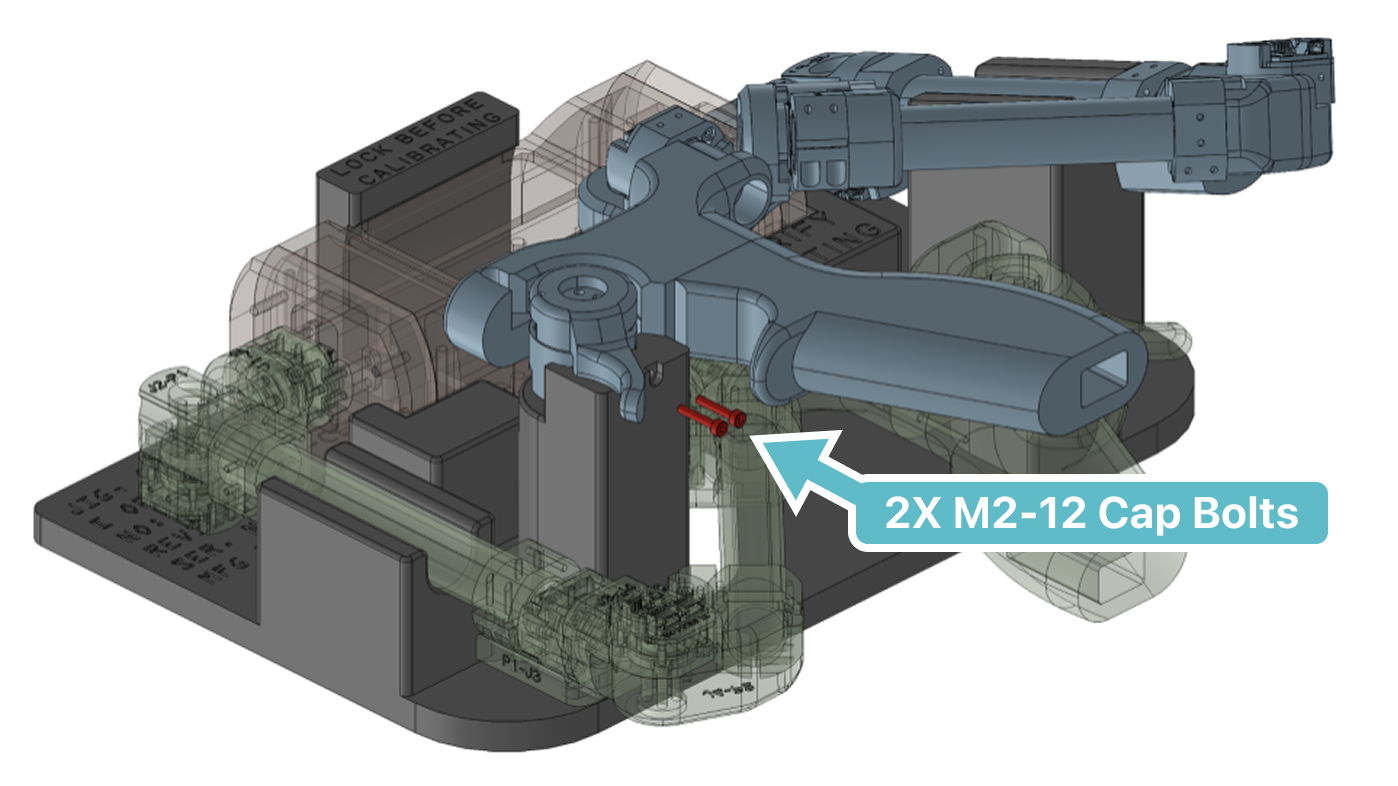
Step 7: Left- Fasten J8
With the left arm set in the jig, secure J8 using two M2 screws with a length of 12 mm. While tightening the screws, make sure that J8 is not fixed in a misaligned position.
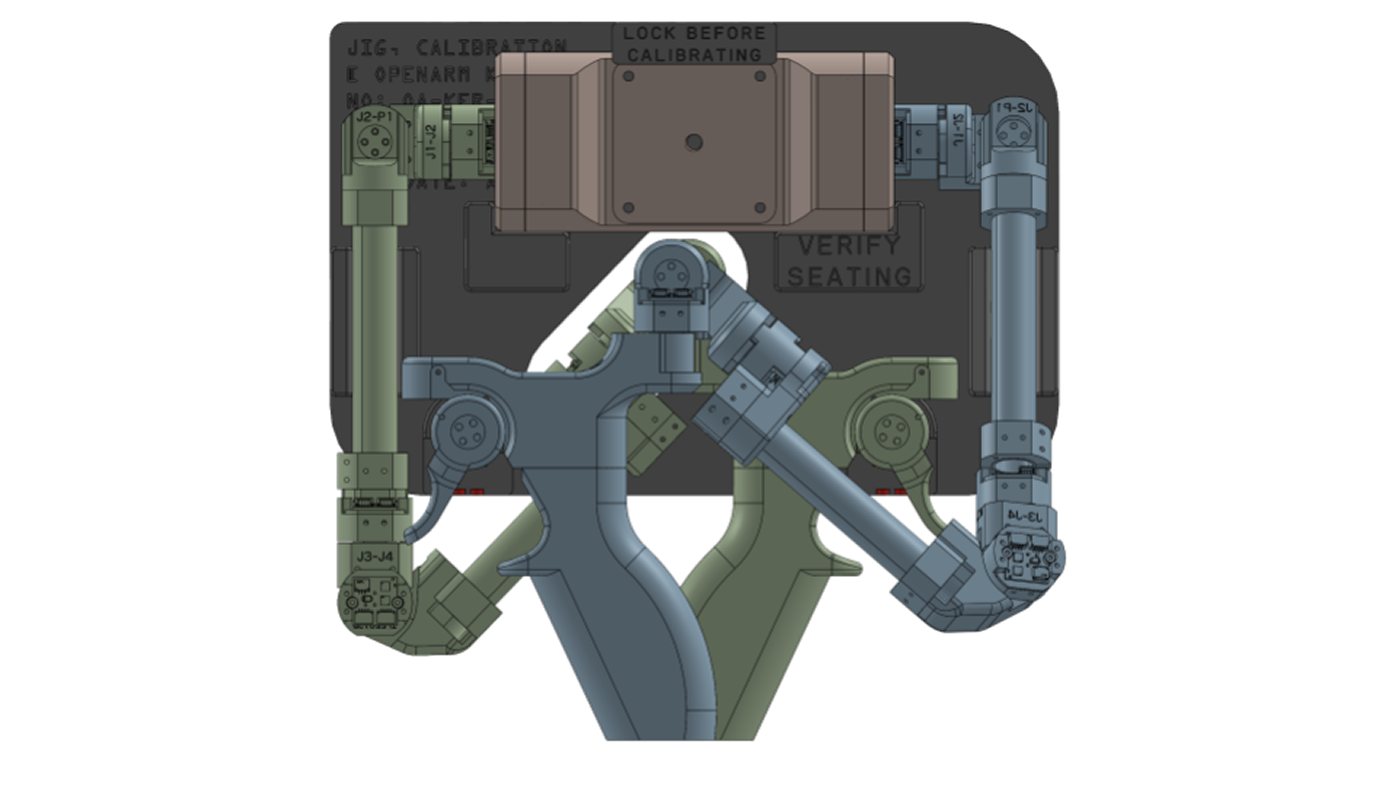
Step 8: Calibration Ready
Once KER is fixed to the jig in the posture shown in the image, the calibration preparation is complete.