ROS2 Control
To get started, follow this guide to install ROS2 first to setup and test the OpenArm description package which you will need for ROS2 control.
The openarm_description package provides the complete robot model and visual representation of the OpenArm system.
Setup
The openarm_ros2 repository contains a collection of packages for use with ros2_control.
It abstracts away the hardware control to expose the arm as an interface that receives position, velocity, and torque commands and outputs joint states.
To get started, clone the openarm_ros2 repository, build the packages, and source the workspace.
git clone https://github.com/enactic/openarm_ros2 ~/ros2_ws/src/openarm_ros2

# Install openarm_can via apt (Ubuntu)
sudo apt install -y libopenarm-can-dev openarm-can-utils
# For manual installation or other platforms, see:
# https://github.com/enactic/openarm_can/tree/main/dev
# Alternatively, build from source via vcs:
# (cd ~/ros2_ws/src && vcs import < ./openarm_ros2/openarm.repos)

# Install ROS2 dependencies
cd ~/ros2_ws
rosdep install --from-paths src --ignore-src -r -y

# If you only want to use mock hardware,
# build with the `--packages-ignore openarm_hardware` option.
colcon build

source ~/ros2_ws/install/setup.bash
⚠️ SAFETY REQUIREMENTS FOR HARDWARE OPERATION
Before operating with real hardware, you MUST:
- COMPLETE SETUP GUIDE: All configuration steps are mandatory
- ZERO POSITION: Ensure you have set safe zero positions for all motors
- EMERGENCY STOP: Keep emergency stop button within immediate reach at ALL times
- CLEAR WORKSPACE: Remove ALL obstacles, tools, and personnel from arm movement area
- POWER DISCONNECT: Know how to quickly disconnect power if needed
Improper operation can cause serious injury or equipment damage. Always prioritize safety.
🚧 ROS2 Control Integration
The openarm_bringup package provides launch files that integrate with the ROS2 control framework. This package provides launch files and configuration to start the hardware interface, load controllers, and connect the physical arm to the ROS2 ecosystem. Once launched, you can use standard ROS2 control tools and interfaces to command the arm and receive feedback.
The bringup package supports both mock hardware (for simulation/testing) and real hardware through a hardware plugin. When using real hardware, you'll need to first install the openarm_can library by following the CAN setup guide.
Hardware Bridge Status The hardware bridging components are currently being updated and may be unstable. The gripper bridging logic is particularly under active development.
Launch
Both v1.0 and v2.0 are supported via the arm_type argument.
# v2.0 with fake hardware (default)
ros2 launch openarm_bringup openarm.bimanual.launch.py arm_type:=v2.0

# v2.0 with real hardware
ros2 launch openarm_bringup openarm.bimanual.launch.py arm_type:=v2.0 use_fake_hardware:=false right_can_interface:=can0 left_can_interface:=can1

# v1.0 with fake hardware
ros2 launch openarm_bringup openarm.bimanual.launch.py arm_type:=v1.0

# v1.0 with real hardware
ros2 launch openarm_bringup openarm.bimanual.launch.py arm_type:=v1.0 use_fake_hardware:=false right_can_interface:=can0 left_can_interface:=can1
Launch files
openarm.bimanual.launch.py- Dual arm configuration
Key Parameters
| Argument | Default | Description |
|---|---|---|
arm_type | openarm_v2.0 | Robot version. Accepts v1.0, v10, openarm_v1.0, v2.0, v20, openarm_v2.0, etc. |
use_fake_hardware | true | Use fake hardware instead of real hardware |
right_can_interface | can0 | CAN interface for the right arm |
left_can_interface | can1 | CAN interface for the left arm |
robot_controller | joint_trajectory_controller | Controller type: joint_trajectory_controller or forward_position_controller |
arm_prefix | `` | Prefix for topic namespacing (for running multiple robots) |
controllers_file | openarm_bimanual_controllers.yaml | Controllers configuration file |
Topics
After launching, the following topics are available:
| Topic | Type | Description |
|---|---|---|
/joint_states | sensor_msgs/JointState | Current joint states for all joints |
/dynamic_joint_states | control_msgs/DynamicJointState | Dynamic joint states |
/robot_description | std_msgs/String | Robot URDF description |
/tf | tf2_msgs/TFMessage | Transform tree |
/tf_static | tf2_msgs/TFMessage | Static transforms |
/left_joint_trajectory_controller/joint_trajectory | trajectory_msgs/JointTrajectory | Command: left arm trajectory input |
/right_joint_trajectory_controller/joint_trajectory | trajectory_msgs/JointTrajectory | Command: right arm trajectory input |
/left_joint_trajectory_controller/state | control_msgs/JointTrajectoryControllerState | Left arm controller state |
/right_joint_trajectory_controller/state | control_msgs/JointTrajectoryControllerState | Right arm controller state |
/left_gripper_controller/joint_trajectory | trajectory_msgs/JointTrajectory | Command: left gripper trajectory input |
/right_gripper_controller/joint_trajectory | trajectory_msgs/JointTrajectory | Command: right gripper trajectory input |
/left_gripper_controller/state | control_msgs/JointTrajectoryControllerState | Left gripper controller state |
/right_gripper_controller/state | control_msgs/JointTrajectoryControllerState | Right gripper controller state |
Actions
| Action | Type | Description |
|---|---|---|
/left_joint_trajectory_controller/follow_joint_trajectory | control_msgs/action/FollowJointTrajectory | Execute trajectory on left arm |
/right_joint_trajectory_controller/follow_joint_trajectory | control_msgs/action/FollowJointTrajectory | Execute trajectory on right arm |
/left_gripper_controller/follow_joint_trajectory | control_msgs/action/FollowJointTrajectory | Execute trajectory on left gripper |
/right_gripper_controller/follow_joint_trajectory | control_msgs/action/FollowJointTrajectory | Execute trajectory on right gripper |
Verifying the Controllers
After the controllers are successfully launched, you can verify they're working by checking the available topics and actions:
ros2 topic list
ros2 action list
To test joint movement, send a simple trajectory command:
ros2 action send_goal /left_joint_trajectory_controller/follow_joint_trajectory control_msgs/action/FollowJointTrajectory \
  '{trajectory: {joint_names: ["openarm_left_joint1", "openarm_left_joint2", "openarm_left_joint3", "openarm_left_joint4", "openarm_left_joint5", "openarm_left_joint6"], points: [{positions: [0.15, 0.15, 0.15, 0.15, 0.15, 0.15], time_from_start: {sec: 3, nanosec: 0}}]}}'
This command moves all left arm joints to a 0.15 radian position over 3 seconds.
🚧 MoveIt2 Integration
MoveIt2 is a powerful framework for robotic manipulators that combines inverse kinematics, perception, path planning, and control capabilities.
The OpenArm MoveIt2 integration is currently under active development.
Getting Started with MoveIt2
Both v1.0 and v2.0 are supported via the arm_type argument. The MoveIt2 demo launch starts the move group, RViz, ROS2 control, and all controllers in one command.
# v2.0 with fake hardware (default)
ros2 launch openarm_bimanual_moveit_config demo.launch.py arm_type:=v2.0

# v2.0 with real hardware
ros2 launch openarm_bimanual_moveit_config demo.launch.py arm_type:=v2.0 use_fake_hardware:=false right_can_interface:=can0 left_can_interface:=can1

# v1.0 with fake hardware
ros2 launch openarm_bimanual_moveit_config demo.launch.py arm_type:=v1.0

# v1.0 with real hardware
ros2 launch openarm_bimanual_moveit_config demo.launch.py arm_type:=v1.0 use_fake_hardware:=false right_can_interface:=can0 left_can_interface:=can1
Key Parameters
| Argument | Default | Description |
|---|---|---|
arm_type | openarm_v2.0 | Robot version. Accepts v1.0, v10, openarm_v1.0, v2.0, v20, openarm_v2.0, etc. |
use_fake_hardware | true | Use fake hardware instead of real hardware |
right_can_interface | can0 | CAN interface for the right arm |
left_can_interface | can1 | CAN interface for the left arm |
robot_controller | joint_trajectory_controller | Controller type: joint_trajectory_controller or forward_position_controller |
Motion Planning
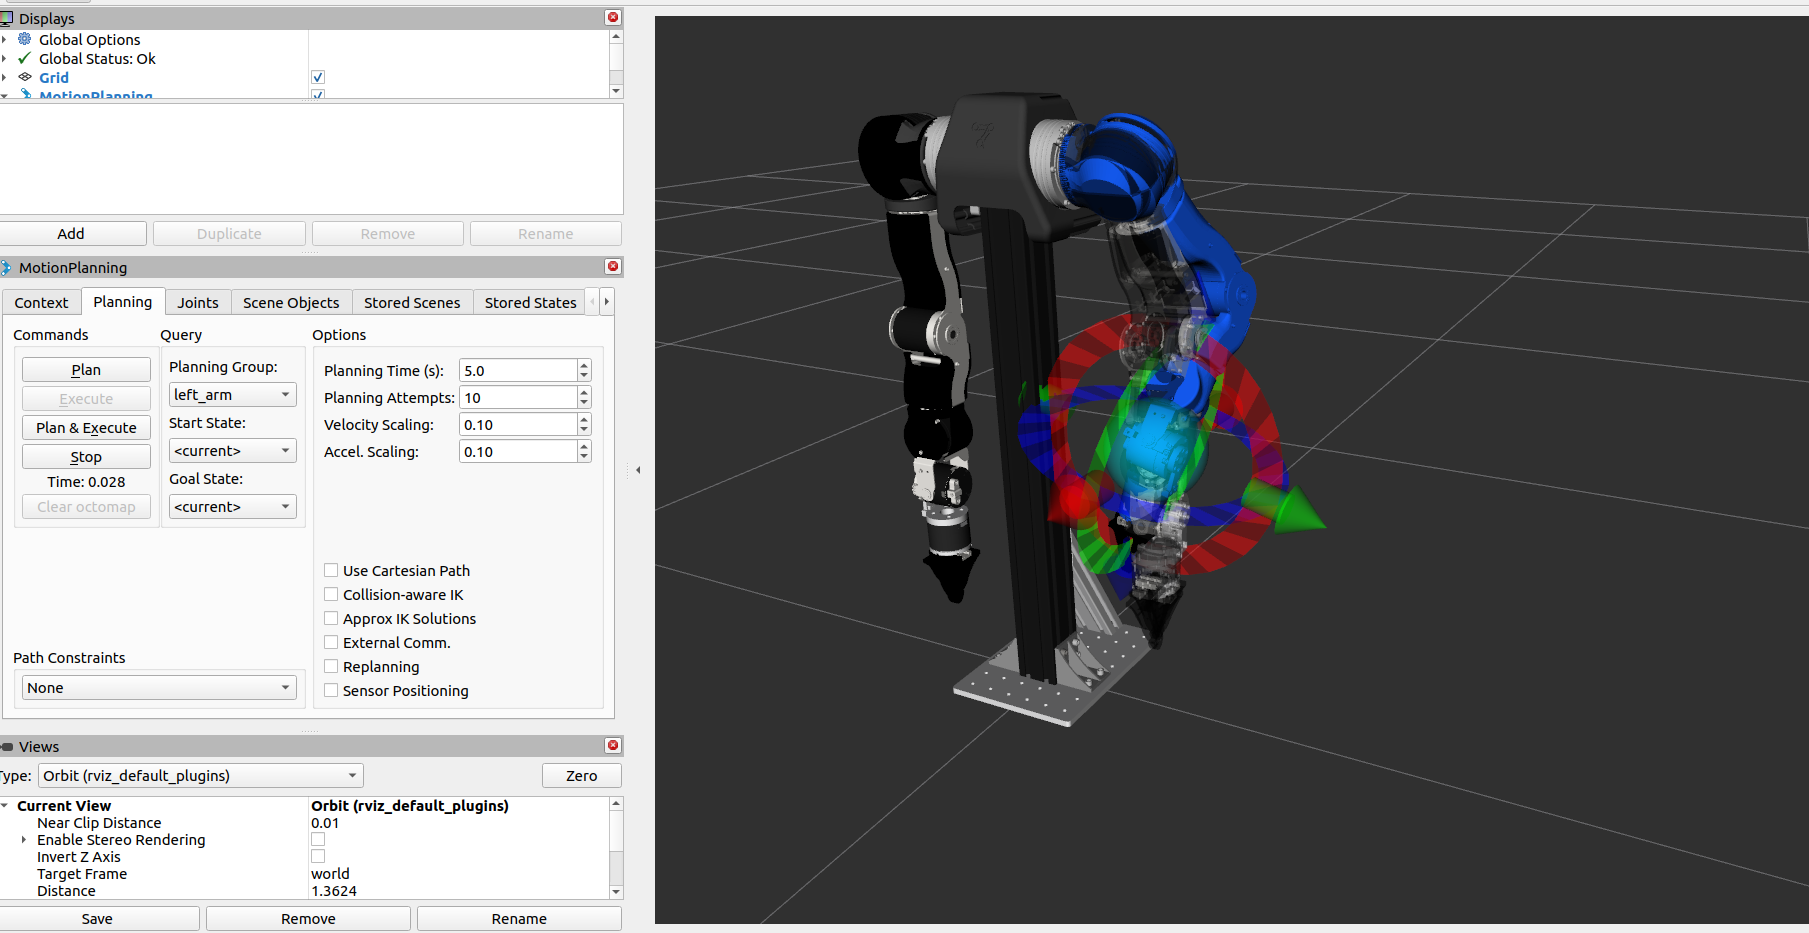
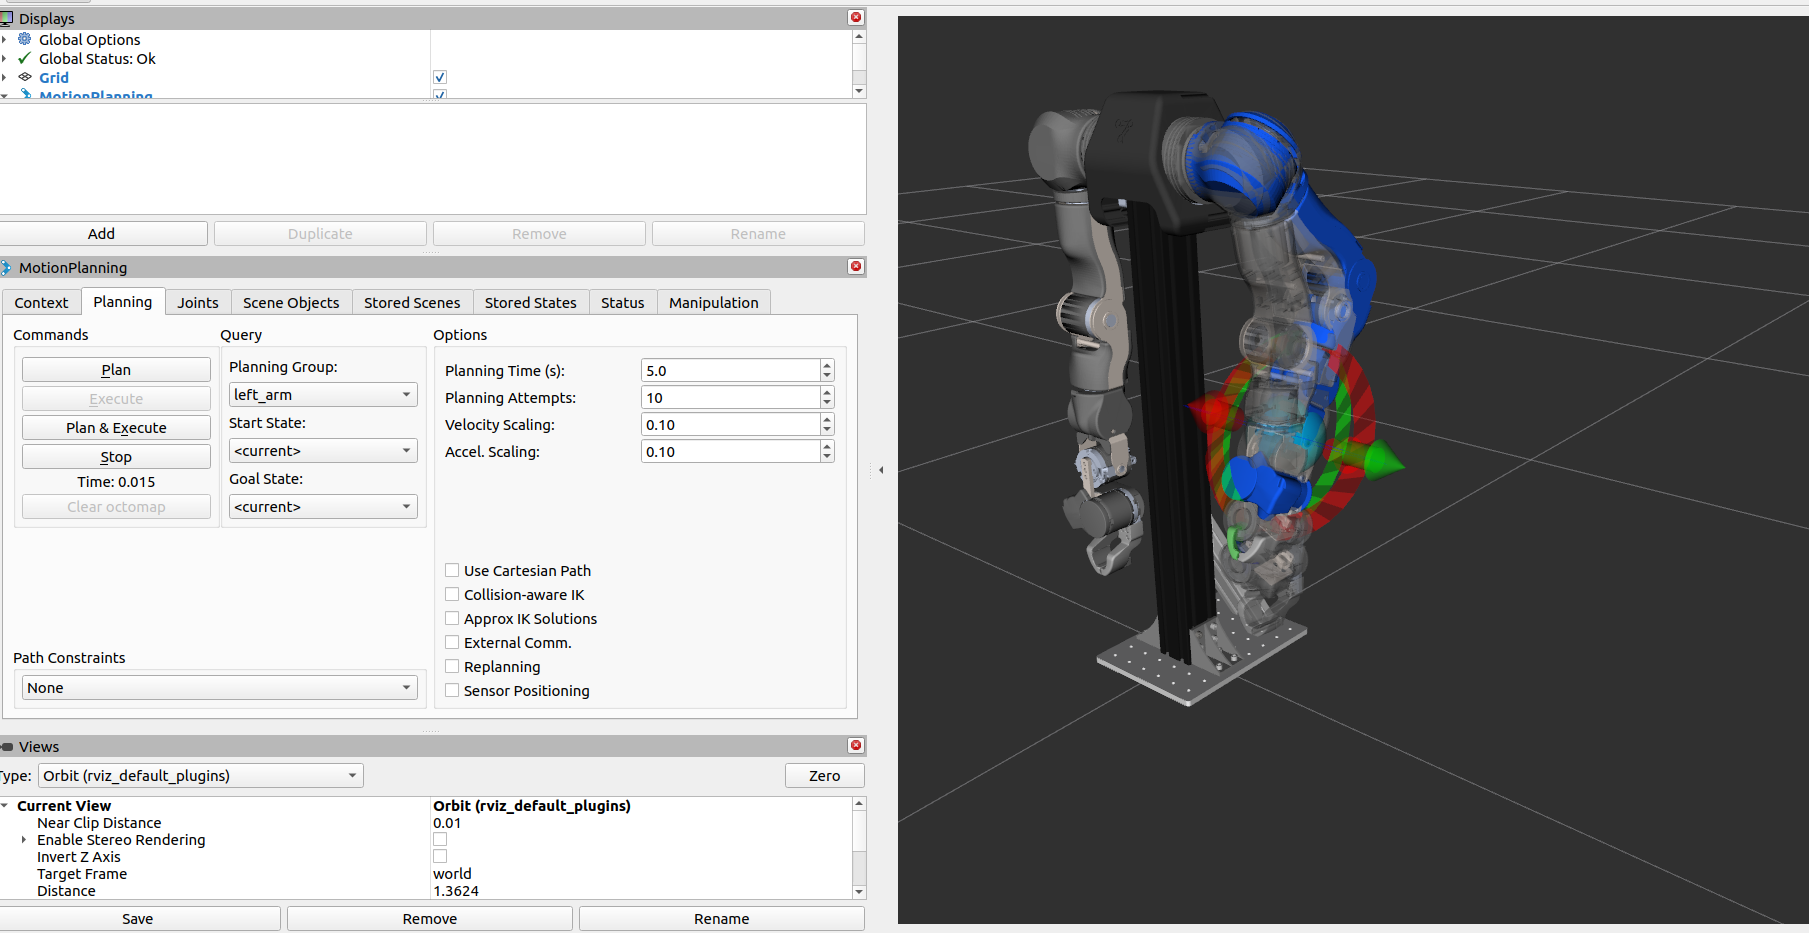
Target positions can be set in the Joints tab in the MotionPlanning panel on the left. Alternatively, the targets on the arms can be dragged and rotated to a target pose, or the goal state can be selected from a list of preset keypoints under Planning > Goal State.
The Planning tab provides a GUI to generate trajectories to reach a goal position. Clicking on Plan to preview the path is recommended.
The MoveIt2 integration is actively being developed. Check the openarm_ros2 repository for the latest updates and features.
Control Gains
The default gain is set to a relatively low value for safety. As a result, the arm may not be able to reach high angles in some cases. The gain can be adjusted by editing the following configuration file and rebuilding.
v2.0:
- Edit
assets/robot/openarm_v2.0/config/arm/control/control_gains.yaml - Rebuild by
colcon build
v1.0:
- Edit
assets/robot/openarm_v1.0/config/arm/control_gains.yaml - Rebuild by
colcon build
⚠️ GAIN TUNING SAFETY Please adjust the gain with great care. Start with a lower gain and verify the behavior first, then increase it gradually. If you execute an action with a large position difference while using a high gain, some controllers may generate dangerously high velocities.